 Back at the Autumn equinox, I said that one of my goals for the next three months was to create a sourdough starter. After all, that way I get home grown yeast, which means I can include bread recipes in this blog! And, of course, delicious sourdough bread.
And now, I have success! I began my starter about a week and a half ago, and yesterday, I successfully made my first loaf of sourdough. My starter incorporates another home grown ingredient in addition to the yeast: I used Hugh Fearnley-Whittingstall’s trick from River Cottage Everyday, of using a bit of rhubarb to get the fermentation process going. The rhubarb isn’t from my personal veggie patch — it’s from a communal plot at the community garden. I also drew on this starter receipe from Hugh, though I didn’t follow either exactly to the letter.
SOURDOUGH STARTER
Following this recipe will leave you with about 10 tablespoons of starter — approximately 5 of these will go into your first loaf, while the other five remain in the jar, which you then feed, to re-grow your starter.
Ingredients
From the Garden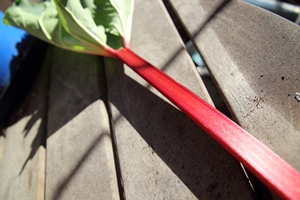
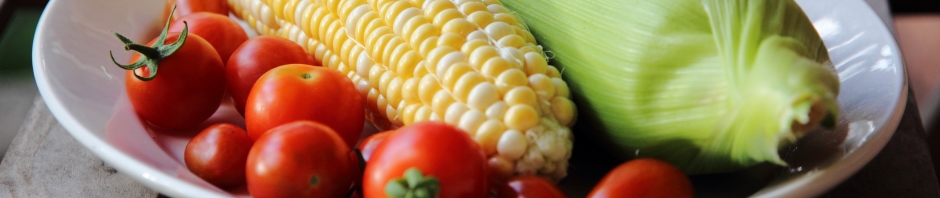
- One small stick of rhubarb, chopped into 2 pieces of 6-7cm each
Australian
- Approximately 20 tablespoons of strong white bread flour (I’d recommend just having a whole box on hand).
- Approximately 8 tablespoons regular everyday wholemeal flour
- 1L unchlorinated water
Method
Overall, in making this starter, I relied far more on texture, appearance, and smell than on exact measurements, which I know is supposed to be a bit no-no for baking, but it seemed to work. At the same time, one thing I have learned since I started baking bread earlier this year, is that little changes in moisture, temperature, etc, can make a big difference to how things turn out, so going by feel isn’t all bad.
So, here’s how I did it:
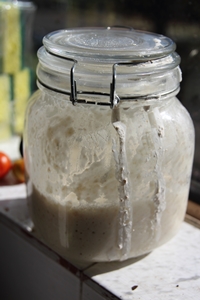
Into a clean glass jar with a glass side (you can see the one I used in the picture above) place three heaped tablespoons of strong white bread flour, plus one heaped tablespoon of wholemeal flour. Have about a cup of warm (but not hot) unchlorinated water by your side. Slowly mix this water into the flour, until it has a thick, creamy texture — Hugh suggests in television version of River Cottage Everyday (I don’t actually own the book!) to make it roughly the consistency of double cream, so I went with that. Then, keep mixing, throw open the windows of even go outside, because you want to capture any wild yeast floating around! You might want to use an egg whisk for this, but it’s up to you.
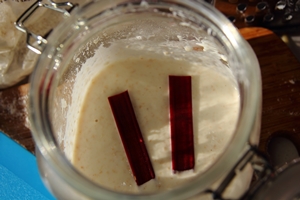 After mixing it for 10-15 minutes, add your rhubarb (I had a small, thin stick of rhubarb, so I used two 6-7cm pieces, but if the stick had been thicker, I would have used only one), seal your jar*, and leave it in a warm place. I left mine on the kitchen windowsill during the day, where there is lots of afternoon sunlight, but kept it next to the stove at night, where it would get the heat from our cooking.
24 hours later, check the starter. If it has bubbles in it, and smells pleasantly of fermentation (an ale-like smell) then hooray! Your yeast has started reproducing! If not, you might need to leave it longer, but fortunately, mine was alive by this point.
Once your yeast is alive, discard the rhubarb, and about half the starter. Then replace the discarded starter with fresh flour, keeping roughly to the 3:1 white/wholemeal ratio. Mix the flour in, then add enough room-temperature unchlorinated water to bring it back to that double-cream consistency. I did this by using a dessert spoon or a large soup spoon: I’d remove 4-6 spoonfuls of starter, and then replace it with 4 heaped spoonfuls of flour — generally three of white flour and 1 of wholemeal.
 Now, you just need to keep doing this every 24 hours or so for a week. I say “or so” because it’s not a huge problem if you leave it a bit longer. I left mine about 36 hours a couple of times, and there was no issue. As your starter develops, you will notice some changes — you will see more and more bubbles on top of your starter every day, and the smell will change. At first, the smell of fermentation will be a bit acidic. Not bad, but acidic. Towards the end of your week though, it will start to smell sweeter and fruitier — almost like the smell you get from a fruity white wine. This means that your sourdough is ready to use!
It also means that you don’t have to feed it everyday anymore. If you’re planning to make weekly loaves, then you can just feed after making your loaf (though you may want to feed it some extra in the days leading up to your baking, if you plan to use a lot). I’ve heard that starters can go for up to three weeks without feeding, but I’m planning on doing at least a weekly feeding — maybe more depending on how it looks. As with everything else here, I’m going to go by feel — if the starter still looks lovely and bubbly, and if it smells right, I’ll let it go on its own. But if its bubbles start to lose their bubbliness, or if it starts smelling acidic, I’ll give it a little feed.
Now in terms of proving (heh) that this starter recipe works, I present to you, my readers, my very first loaf of sourdough:
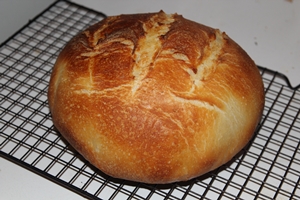
I’m not actually going to post the recipe right now, as there are a few elements of the method that I want to perfect first (I baked this one slightly too long/at too high a heat, so the bottom is slightly burnt), but clearly this is properly risen bread, and it feels and tastes like sourdough (soft, chewy, and delicious). So, hooray! Bread is now on my blogging menu!
*A sealed jar worked just fine for me, but I have read that you shouldn’t seal your jar tightly if your starter takes up most of the room in the jar — this is because it grows, and if the carbon dioxide doesn’t have anywhere to escape, it can end up taking on a life of its own, mushrooming out of your jar, and then taking over the world. So, to save us all from a future dominated by sourdough starter overlords, do be careful with this method.
